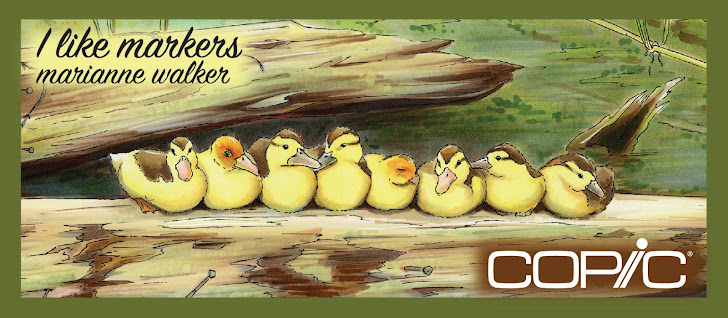
Friday, December 11, 2009

Class updates & winner

Printers & Coloring
I want to thank everyone for their help in commenting on printer types and coloring earlier this week. As you can see if you read the comments there are many kinds of printers and inks out there. Some work for coloring with Copics, some don't, some need to be heat-set, others just need to have the printout sit for a while.

Skim through the comments to see if your printer type is listed. Otherwise, just carefully test your printer's ink before you print up a bunch of things to color. If in doubt, just photocopy it.

Prize winner
There were 120 comments, and our cute little bird has a lot of things he could be saying. I went to Random.org to use their number generator to find our Prize winner:

The winner of the prize pack is Carly!!
Carly said...

. "I guess Santa Claus really does exist" or
"Yes, Crafters there IS a Santa Claus"

2. I have a HP Photosmart C7280 All in One.
And I'm a Copic Virgin so I have no idea how they do with my printer. But, maybe it will be my lucky day & I will soon find out!

Carly, it IS your lucky day! send me an e-mail to claim your prize so you will no longer be a Copic Virgin.

There were a lot of really cute sayings, so I had a hard time picking a new saying for the birdie. Check back for the final colored image and what the little bird thinks about the snowman with the giant Copic Marker.

CHA, CHA, CHA
As we get closer to the January Craft & Hobby Association shows, we are also getting closer to having all the Certification classes for Feb-April picked out. If you or your local stamping store will be attending the wholesale only Winter CHA Show you can stop by our booth, #2563 to meet all of our instructors. Get to know your regional instructor and get a special workshop set up at your store. You can also get ideas about teaching your own Copic papercrafting workshops, so stop by and chat.

There are a few options during both the CHA Consumer Craft Supershow and the CHA Wholesale Show.

• If you are a store, design team member, or instructor/employee for a papercrafting store you can register now for one of two Certification Classes. These are Beginner/Intermediate classes and are intended for people who will be going on to teach what they've learned to others. Certificatins are technique only, and no finished product will be made. Classes run from 9 am to 4pm and you can pick either Friday, Jan. 22nd or Saturday, Jan. 23. Send an e-mail to nancy@copicmarker.com for an application. Note: Remaining spaces will open to the public after the first of the year. Get an application in now to be on the waiting list for these classes if you are not affiliated with a store or company.

• If you are a papercrafter searching for a good beginner workshop where you make a finished card and learn basic techniques you can take the Copic Cardmaking class during the CHA Craft Supershow. Friday Jan. 22nd from 1 to 3pm. Cost is $30 and you make 3 finished cards. Note: If this fills they will add extra sessions, so register NOW!

• If you are just wanting to hold, touch, color, and know why people are obsessed with Copic Markers you can stop by the SplitcoastStampers booth for a fun and cute make n' take all day, both Friday or Saturday of the Craft Supershow (if you're early they may also have cupcakes!)

Papercrafting Copic Certifications
Although the San Antonio classes this weekend are full and closed, there are still some classes currently open and will be opening to the public in the next few weeks. Sign up now for the waiting list even if you are not affiliated with a store or other papercrafting company!

If you need an application or to get on the mailing list for any of these locations please e-mail nancy@copicmarker.com
This list will be updated, so keep looking for more locations near you in 2010!
Jan. 10th, Sarasota, FL taught by Sally Lynn -Open to Stores and Designers
Jan. 22nd, Anaheim, CA Taught by Sherrie Siemens, Colleen Schaan, & Kathy Sanders Open to Stores and Designers

Jan. 23rd, Anaheim, CA
Taught by Sherrie Siemens, Colleen Schaan, & Kathy Sanders Open to Stores and Designers

Feb. 21st, Shawnee, KS Taught by Sally Lynn. Applications have not gone out yet.

March 5th, Des Moines IA Taught by Lori Craig. Applications have not gone out yet.

March 13th, Lafeyette, LA
Taught by Colleen Schaan. Applications have not gone out yet.

March 21st, Long Island, NY Taught by Sally Lynn. Applications have not gone out yet.

Have a great day, and have fun coloring!!

Monday, December 7, 2009

Digital Printouts, Testing Inks, & Giveaway

I know many of you like to print out blank pictures and color them in with your Copics. This is the technique I use when doing an Illustration, I draw it then scan it in, touch it up, and print it out. However, a lot of you still have questions.

Digital Printouts
Copic Marker inks will not destroy lines printed out from a laser printer or standard photocopier. This is because they are toner-based devices and the toner is fused to the paper so the alcohol ink from the markers will not destroy it.

Many of you are working with inkjet printers though. This gets a little more tricky and I can't say it will work or not. Each printer uses slightly different inks and you really need to test your printouts before you color and make a mess. My mom uses a really old inkjet and any kind of moisture will destroy a printout from her machine. However, we have a newer, large format Hewlett Packard printer with archival, pigment inks at work and the markers color just fine on things I've printed from there.

Testing Inks
Testing a printer ink is the same as testing any other inks. Print something out on the same paper you would regularly color on, then follow the steps on this older post to see if your ink will hold up without destroying your marker nib.

Another technique I frequently use is to make a blob with my marker next to the ink I'm going to be testing and "push" the marker into the ink line by over-soaking the paper. Here I am testing a cheap ballpoint pen ink to see if it will bleed with my markers. I'm careful to not let the tip of my marker touch the ink line. Work with a light colored marker so you can easily tell if it's messing up the line. This is the technique I show during Certification Classes.

As you can see, cheap ballpoint pens do not work well with Copic markers. However, if you have a large colection of ballpoint pens you can donate them to kids in Africa who need them for school through the nonprofit organization Pens for Kids. This would help them have a happy Holiday season and help you clean out some of the clutter in your drawers.

Happy Holidays Giveaway
Meanwhile, I have an early Christmas gift for you. Your very own blank picture to download and try coloring with markers.

I'll be coloring this later this week, but I first need your help coming up with something for the little bird to say.

You could be the lucky winner...

Simply leave a comment today with:

1. A suggestion for what the bird should say .

2. If you have an inkjet printer let us know what model (or kind of ink in the printer) you use and how well Copics work when you color printouts. If you decide to print this out and color it then you can also leave a link here to your finished piece.

Thanks for playing! On Thursday I will choose a random winner from the comments to get a mixed goody bag worth about $40 in Copic products. And I'll show some of my favorite things for the bird to say.

By the way, I was going to have the bird say "Now all we need is a Dame singing love songs..." You could probably come up with something better :)

Good Luck!

Note: This Contest is now closed. Comments are still welcome on printer types but prize winners have already been chosen.

Friday, December 4, 2009

Friday Art Links

This year has flown by and next year is just around the corner. Amazing how fast the years go when you're busy. I have a couple fun links for people today, and I hope you enjoy them or feel inspired by them.

For Papercrafters-

Archivers
When I was at Scrapfest in September Archiver's filmed a quick coloring tutorial for their website. This link will take you to my Beginner Coloring with Copic tutorial.

You can check out all of Archiver's other fabulous product tutorials here.

Fine Art Links-

Medical & Instructional Illustration
I was recently contacted by a fabulous illustrator and I wanted to show you his work. Jason Laramie uses many mediums to create his illustrations, including Copic Markers. Dig through his gallery a bit for some examples of his images.

Beginner Illustration Technique-
I love this blog in general, and here is a neat tutorial for beginners on how to take a photograph and with some simple filters in photoshop use it as a base for making an illustration. Dig through Holly's site, as she has some gems in there.

Ok, so I'll post another great tutorial next week. Have a creative weekend!

Monday, November 23, 2009

Shadows Part 13 - Shading & Cast Shadows

Someone in a recent class asked me why I had soft blends in some areas when I color and crisp lines on my shadows in other areas. This got me thinking that I haven't really explained the difference clearly enough between shading and adding cast shadows.

Flat Coloring
The first thing that people notice about images colored with Copic markers is how smooth everything looks. By coloring in small circles and evenly soaking your paper you can finally get a flat area to look perfectly flat.

This also gets boring real quick because we know that the world is not flat. This Granny image is from the new release over at Our Craft Lounge. She looks pretty lifeless with plain, flat coloring. I used R83, YR000, YG11, E35, B41, and BV31. I like Granny because she is a character who is very much alive and has personality - NOT destined to be flat her whole life (especially with all those chocolates she's eating).


Shaded Coloring
When we want things to look more alive we add shadows. If you look at the whole list of shadow posts you can see all my directions over the last year or so about adding shadows. I have tried to simplify shadows as much as possible, so don't get overwhelmed if you think you can't do it, just scroll to the beginning and start there.

If you look at this simple diagram you can see the difference between something flat and something with volume and substance.

When Shading, the first step is to pick our light source. In this case, it is coming from the upper left corner. I leave my green cylinder (YG11) white on the side closest to the light and faded in BG93 to create the shading. Because this object is rounded my shading from light to dark is smooth.

Here is Granny with simple shading added. She looks much more alive than she did at first. I added R85 & R89 to the R83, E11 to her skin, and BG93 to the chair. I smoothed darker colors in by layering light-dark-light, so an area like her skin would have been colored YR000 + E11 + YRooo. So far, all of these are smooth blends from light to dark.

I think she's still missing something, though.

Cast Shadows
If you look back at the shading diagram you'll see the volume of the cylinder has left a shadow on the ground, or a Cast Shadow.

On a cast shadow you see the edges are crisp, with no soft shading. This is because the light is blocked in a straight line by the hard edges of the object. This adds to the illusion of volume and we can really feel that our object has substance. However, this is a simple object.

The world is made up of much more complex shapes and objects than the cylinder. If we add a top to our shape then the shadow changes as well.

Look at the first "lamp" in my diagram. The shadow it leaves on the ground mimics the shape that we know the object would have in real life. So we have the cast shadow of the whole image.

But look at where the "shade" overlaps the base. There needs to be a shadow here as well because the top is blocking light on the ground AND on the base.

The shadow the top casts will have hard edge because it is blocking the light in a straight line. By adding the darker shadow on the green area we can really get feel for the dimension this "lamp" has.

Let's look at Granny again.

Her dress hangs over her legs, so let's cast a Crisp shadow on her legs. Her head sticks out over her neck, so she gets a shadow there, too. Don't forget the chair, as Granny is blocking the light that is hitting the chair, so those will be crisp shadows as well. Her hair casts a shadow, as does her box of chocolates.

By deepening the shadows and making some crisp while leaving the basic shading smooth you can really get a sense of granny's volume. Look at how much more dynamic her legs are in particular (you never thought of granny's legs as being dynamic, did you?)


Here is my final Granny. I used a gray multiliner 0.05mm to add scribble flowers to the upholstery and I added a hint of B41 to the ground and behind the chair just to give her a bit more life. I hope this helps you in your coloring. Have a great week, and enjoy eating your own sweets. Don't forget to check out the other fun stamp sets in the new release from Our Craft Lounge!

Friday, November 20, 2009

Thinking Ahead to Winter CHA

It's Friday and I'm back from a busy week of travel and a trade show at the University of Oregon. I just want to give a quick rundown of upcoming events. January may seem like a long time from now, but we at Copic are getting things ready for Winter CHA.

Jan. 22 & 23 CHA Craft Supershow, Open to Public
Stop by the SplitcoastStampers booth any time during the show for a free make-n-take hosted by Copic. If you wish to attend the show, the Coupon code CRAFT20 will take $5.00 off of the admission cost for the CHA SuperShow. Tickets may be purchased online at www.craftsupershow.com.

When CHA class registration opens there will be some fabulous Copic cardmaking classes hosted by Jennie Black. These are a great way for the beginner to get a flavor of Copic and learn how to use their markers better. These classes are in conjunction with Our Craft Lounge.

There will be many vendors at the Craft Supershow selling Copic markers, so be looking for some great places to shop at the show as many of your favorite companies will be there.

CHA Copic Certifications
Applications are now available for the two certification classes on Jan. 22 & 23rd at the Anaheim Marriott, across from the CHA Convention. If you need an application please e-mail nancy@copicmarker.com

Each class runs from 9 am to 4pm with an hour break for lunch. These will be taught by Sherrie Siemens and each of these classes will also be assisted by two of our other new, Regional Instructors.

Also, we will have a list of upcoming Feb. 2010 certifications available next month, so keep looking for more details.

Sunday, November 15, 2009

Congratulations!

Wow! What a fabulous response to the Copic giveaway! I must admit that I haven't read all the comments yet, but there are some really great comments that have been posted on each blog in our celebration. Thanks to all of you for helping our new team feel welcomed and appreciated.

For now, I'd like to announce the winner of my prize drawing. There were 439 comments on my blog alone. And with the help of Random.org the following winner was chosen:

Blogger Colleen said...

Congrats to everyone! Love the Copics because of their versatility and the ability to airbrush just makes them that much more fun!

Congrats Colleen!!!

And a big congratulations to the winners from the other blogs. You'll have to let us know how you use your prizes once you get them.

I'm hoping to post a tutorial early next week, so check back here for more tips and ideas for coloring. Have a fabulous weekend, and see you next week at the U of O Trade Show in Eugene OR.

Friday, November 13, 2009

Granny Birthday card

This month celebrates three anniversaries for me. One of which is coming up this weekend, the other two are closer to the end of the month. The anniversary I'm celebrating this weekend is the first anniversary for Our Craft Lounge! Last year on November 14th OCL went live to the public after months of behind the scenes work. My other two anniversaries are 9 years working for Copic and 7 years being married to my dear husband.

Today we are also celebrating the birthday of someone here at work, so I made her this lovely Granny card. This card was made using the set Granny's Secrets, one of the 5 different Granny sets currently available from Our Craft Lounge.

Pre-Soaking with Colorless Blender
One technique I used on this card that you may not be aware of is the gray area under Granny's chair. I didn't have a light enough shade of gray within easy reach so I used my colorless blender and pre-soaked the area in which I wanted a shadow. Then I added my C3 and it was much lighter because the paper was already wet. It was also much easier to fade out the edges with the blender because the paper was pre-soaked.

Another thing you can't tell is that because Granny's dress has such a tiny pattern I colored it with the fine end of my Copic Original markers. The middle of each flower was colored with my R35 then I lightly touched it with blender to get it to wash out. One layer of the white silk flower I touched up with a yellow marker to accent the rich yellow center.

Markers:YR04, Y15, Y11, E33, E37, R35, C3, 0, E00, E11, assorted Spica pens, Paper: Neenah Classic Crest Solar White, Prism Papers, Other: Prima Say it with Crystals and leaves for the photo.

I hope each of you has a chance to head over to the forums at Our Craft Lounge or their blog to check out their scavenger hunt and get a chance to win some fabulous prizes. You still have one more day to leave your entry on my last post to win a special Copic prize as well. Good Luck!

Wednesday, November 11, 2009

New Regional Instructors & Blog Team 2010

Note: Commenting on this post is now closed. Thank you for your comments!

You may feel that I have really dropped off the face of the earth right now but actually I have been very busy making it even easier for everyone to get the Copic instruction they need. Now Certifications will be coming closer to your home town...

Over the last few days we at Copic hosted a special training session. Not a regular Certification, but a special training to add some very talented ladies to our team of Regional Certification instructors.

You can meet each of these people at CHA and if you are a store looking to have a special event hosted by Copic you can contact them directly in your region to arrange something. Stores attending CHA can also ask our great team for ideas and advice on how to teach their own Copic classes and build their customer's knowledge, so look for their table at CHA (And we are planning for the future, so if you thought a regular Certification was fun, just you wait). Each of our new instructors will begin teaching after Winter CHA, in addition to our current team. (For more photos like this one visit Debbie's blog, as we seemed to be too busy to take photos. Thanks Debbie for remembering!)

If you are a store interested in contacting one of the Regional Instructors please send e-mails to nancy@copicmarker.com Be sure to include where you are located and how large your classroom space is. We will forward your request to the instructor nearest you and they will personally contact you. If you are wanting to attend a class in your area also e-mail Nancy and she'll add you to the mailing list for that area.

We have switched a few people on our blog team as well, but all the names are ones you should already be familiar with.

And so, without further fanfare...

The new Copic Instructors and their regions are:

Colleen Schaan
Colleen will be covering the Southern US. She has been teaching some absolutely fabulous online Copic classes through Our Creative Classroom and has visited stores in here area. Now you can take Certification Classes from her and ask her to host something special in your store if you're in her new region, as she will soon be moving to Atlanta. Welcome Colleen!

Lori Craig
Lori will be covering the Central Midwest, US. Lori should be a familiar name to many stampers, and I think we all adore Lori just as much as she adores grits (a wink right at you Lori!). In addition to her duties at SplitcoastStampers, Lori will be occasionally teaching Certification classes around Kansas, Missouri, and nearby states, so welcome to our team!

Sharon Harnist
Sharon gets to visit stores and teach Certifications from her home state of Texas up to Lori's area, and I'm sure the two of them will be co-teaching classes as well, since they are great friends. Sharon is a name you've seen around here for a while, but she also helps Ellen Hutson, Just Rite Stampers, Inchie Arts, Lockhart Stamp Co, and Taylored Expressions to name a few! Now she's on our Blog team as well, so thank you Sharon!

Kathy Sanders
Kathy will be teaching in the Northern Midwest/Chicago area. Kathy is a name you might not be familiar with unless you're on Splitcoast and recognize her as making some fabulous cards & tutorials. She has also taught Copic classes to papercrafters at her home store in Brookfield Wisconsin, Creative Pals, for over 6 years! If you've ever seen Whipper Snapper design's colored card examples most likely it was sweet Kathy who colored it.

Then, some other names you already know on our Design Team and some are also teaching Certifications:

Sherrie Siemens- Certification Instructor, Western Canada and Pacific Northwest. Look for more classes from Sherrie not just in Canada, but also in Washington and possibly Alaska (Betty, Nancy that's just for you!). Now Sherrie is also on our Design/Blog Team.

Sally Lynn MacDonald- Certification Instructor, North Eastern US and Eastern Canada. Sally Lynn already has a full schedule for 2010 scheduled so check out her blog for dates and locations. She has also been added to our Design/Blog Team, so look for great inspiration from her as well!

Debbie Olson - Certification Instructor, Regional Floater. Debbie may occasionally fill in and teach or assist at Certifications all across the country and she'll be helping us a little more with special projects, so look for more great things from Debbie.

Marianne Walker- me. I'll be floating around like usual and covering classes more in California, Oregon, and the Southwest region. I am also proud to announce that I made the blog team (oh wait, I guess I was already on the team, sorry!)

Michelle Wooderson - She's still our steadfast blogger, out there making faboulous projects using Copic Markers like she has for the last few years. We love you Mish!!

And we want to leave Trudee with a big warm hug and thank you! Trudee hasn't been doing as much papercrafting recently, but we thank her for all her gorgeous work as a past Copic Design Team member.

Go visit the blog of each of these people to really get to know them better. We are so lucky to have them on our Team and are looking forward to 2010!


Copic Giveaway
!!
To celebrate the new team we are offering a special giveaway. Simply go to each blog listed below and leave a comment. The winner gets to PICK their prize: Either 12 Sketch of their choice or an ABS-1.


To enter, please leave a comment on this post letting us know either how you use Copics, which Copic products you use, why you love them OR why you wish you had Copics. Be sure to include contact information/link so we can inform winners.


You have 8 chances to win, since there are 8 blogs to visit. In addition to one winner from each listed blog, we at Copic will be reading through comments. If we find a testimonial that we really like, then we will contact that person to use their story for the CHA booth and whomever we choose would get an equal prize to the random winners. So make your comments good, and make them different on each blog for even more chances to win! There will probably be two or three winners chosen total on comments, as well as the one winner for each listed blog (The testimonial winners will not be announced right away, but random winners will).

The drawing begins on Wednesday, November 11, and ends on Saturday, November 14 at 11:59pm. This varies from blog to blog, by the way.

Blogs to visit:


Marianne Walker, Copic Product Specialist, Certification Area: West/Southwest, Floater

Debbie Olson Copic Blog Team, Certification Area: Floater

Sherrie Siemens Copic Blog Team, Certification Area: Western Canada, Northwest US

Sally Lynn MacDonald Copic Blog Team, Certification Area: Northeast US and Eastern Canada

Sharon Harnist Copic Blog Team, Certification Area: Southern Midwest

Lori Craig Certification Area: Central Midwest

Colleen Schaan Certification Area: South

Michelle Wooderson Copic Blog Team

Kathy Sanders Certification Area: Northern Midwest and Chicago area. No blog yet.


Good luck and have a great time coloring!

Monday, November 2, 2009

Certification and Thank You

I'm back from a fabulous trip to Grand Rapids last week. The Certification was a lot of fun and I was happy to meet both old and new friends there.

When I went to the certification class in Coos Bay a week ago I took my husband with me. He makes videos and in his spare time he made this simple promo video for the store that the class was hosted in - Memories of Time. Here is the nice video he made for Michelle, owner of Memories of Time.


What a cute store! I love going around the country and seeing all the different little stores. I'm glad my husband was able to make the video for her, and I can't wait to go back to visit her store someday.

Meanwhile, I need to update everyone on upcoming certification classes and events.

On November 18 & 19 we will be participating in the University of Oregon Bookstore's annual Tools of the Trade Show. The show theme this year goes along with the U of O Art Museum's current Gallery Show - Art of the Superhero. I will be one of the featured artists at the U of O Tradeshow event and I'll be coloring some appropriate comic artwork just for the event.

In conjunction with that show I can also be found this Saturday evening down at the Jordan Schnitzer Museum of Art here in Eugene doing airbrush demos and letting people draw or color their own superheroes. Don't miss it! Nov. 7th from 5:30 to 6:30 pm.

The evening of November 19th I will be hosting a beginner Copic Marker class for fine art & landscape architecture at the DIVA Gallery, 110 W. Broadway here in Eugene. To register for that class you need to contact DIVA directly or through their website.

December 5th I will also host a Holiday Card Making class at DIVA. This is not a class where I make a kit and everyone makes the same card. Rather, this is a fundraiser for DIVA and I bring down a mixture of papercrafting supplies where we are creating our own mixed-media/altered arts creations. Bring some embellishments to share or swap with classmates. Your class fee becomes a donation for DIVA.

Although the year is winding down we still have some great locations coming up. In January we will announce our schedule for Spring 2010, and you'll see a whole bunch of new locations, so stay tuned. Meanwhile, here are the remaining classes between now and CHA in January.

November
21st Montreal, taught by Sherrie Siemens Full
22nd, Montreal, taught by Sherrie Siemens Opens to Public this Friday
22nd Columbia, SC taught by Sally Lynn Opens to Public this Friday

December
13th San Antonio, TX taught by Sally Lynn Open to Stores & Designers
14th San Antonio, TX taught by Sally Lynn Open to Stores & Designers

January, 2010
10th Sarasota, FL taught by Sally Lynn Applications go out next week

And, for those who are attending CHA:
22nd Anaheim, CA taught by Sherrie Siemens Applications go out next week
23rd Anaheim, CA taught by Sherrie Siemens Applications go out next week

Friday, October 23, 2009

Coloring a black cat

Happy Friday! Tonite I head off to Coos Bay, OR for a small Certification class. Before I leave I wanted to give you a quick Halloween coloring idea. Coloring black objects can be tricky, so I wanted to leave you an example of coloring something black that's got some shape and detail areas to it.

Coloring a Black Cat
Around the Copic warehouse live 6 cats that were abandoned and are now adopted by our crew. Four of the cats are all black, so sometimes just walking to the door at work I'll have a couple black cats cross my path, but I never seem to have an unlucky day because of it. Each of the cats now has a rich, glossy winter coat of fur.

If you've been making Halloween cards with a black cat and you've been coloring in your cats solid black and they just don't look right then this may help. The secret is to color it with grays, not black. To understand the difference between shades of gray you might want to look at this older post about coloring black things.

Here is my cute kitty, ready to go out trick-or-treating. This is a picture that I drew specific for this tutorial, so no, you won't find it anywhere to purchase. I am working on color laser copier paper, since that is what I do most of my original illustrations on. I began by coloring his mask and cape with BG02 and BG05, and added R83 for his little pink nose.

To begin coloring him black I choose a good middle gray. If you remember, the last digit on any Copic marker tells you how light or dark it is, so a marker with a 5 on the end will be a middle value, 9 will be dark, and 0 or 1 will be light (except grays go up to a value of 10 being the darkest). Start light and go darker. If N5 is too dark for you then try an N4, but don't go darker than a 5 for the first color. Try to work smoothly and quickly so you don't get streaks. Note: If you are working on a soft cardstock I have a word of caution later in the post for you.

If you look closely at his ears I left them white and I slightly feathered the gray into the white area. This will make it easier for me to add my pink ears in later.

Next I add my shadows with a slightly darker gray, N7. See how I feathered the edges of the darker color into the light color? This makes it much easier to blend.

After I added my first layer of shadows then I go back with my middle gray, N5 and blend in the colors. Notice how the whole cat got darker. This is why you don't want to start too dark - the whole picture is going to get darker anyways. Any place that I went back over the cat with the N5 is now closer to an N6 in color. I tried not to add any extra N5 to the top of his head or face. This area has the most detail and the strongest highlight, so I want to leave it slightly lighter.

After blending the two grays together you see I lost some contrast. To get the contrast back I am going to add in a hint of N9 to just the deepest shadow areas - under his cape and each of the far legs. Do NOT blend the N9 with the N7 or it will loose contrast, instead, try blending with N5 so you don't lose any more definition to your colors.

Then I took my BG05 and darkened the shadows on his cape and mask a little more.

Last, I feathered in a hint of the R83 to his ears. I made sure his face was dry then I added the little pink cheeks by dabbing with the brush end straight up and down a few times until it pushed the darker colors out of the way. If you do this while the face is still wet you'll get softer cheeks.

Now my kitty is ready for a night on the town. You can still see all the detail lines, but he is a nice, dark cat.

Working with Dark Colors
On soft cardstock the dense dye particles of dark colors want to spread more than those of light colors. This includes dark browns, deep reds, and intense purples and blues, as well as grays. Be careful! Only use as much marker as you need to get it smooth, don't worry so much about soaking the paper. Try to avoid coloring all the way to the lines if you know your paper will feather easily (Georgia Pacific or Neenah with a few layers of color both do this). Let your paper dry completely between color blends so the dye particles don't spread outside the lines as easily.

Look at my little gray cylinder. I made two little mistakes and I want to fix them with my colorless blender. If you make a mistake and go outside the lines with dark colors there are a lot of dye particles that you need to push back into your image.

However, if you remember from high school physics, dense things want to flow to areas that aren't so dense. Once you touch your colorless blender to the dark gray the dense particles are going to spread all over and they won't want to go back inside the lines. If you try to soak it more to push it back inside then the dye from inside the shape will start flowing out onto your paper as well.

A couple ways to solve this problem is to not make mistakes, hide them better, or start over. Another, more tedious method is to put a paper towel under your work and soak as much dye through the back of the paper as possible (this does NOT work with all kinds of paper). Let it totally dry before you try for a second round of erasing so you don't pull more color from inside your picture. I hope this helps. Good luck with your projects!

Friday, October 16, 2009

Friday Art Links & Certification

Once again I want to share some neat art links that I think you'll like.

Artists for Humanity. This grassroots program in Boston helps kids get off the streets and into professional graphic design careers. Check it out, these guys rock (and they love copics!)

I want to remind you that October is Breast Cancer Awareness month. Here is more great art that pays tribute to the struggles and perseverance of those dealing with Breast Cancer:

Carol Ast - Breast Cancer Art These paintings are not for sale, but they show her reflections on dealing with cancer. Take a look and remember those who have suffered.

A Rural Woman's Breast Cancer Journal - This has art, reflections, and updates on treatment as well as other tidbits helpful for those coping with the trauma.

And, an update on 2009 certifications. Soon I will have a listing of certifications in the first quarter of 2010, but for now, just let me know where you would like to see a class (we do take your requests very seriously!)

If you don't have an application for a session coming up please send Nancy an e-mail. nancy@copicmarker.com

San Antonio
For all you Texans who are dying to get into the San Antonio classes, good news! We moved the classes to a larger venue. Those classes are re-opened and will be co-taught by Sally Lynn MacDonald and Sharon Harnist. Please submit your application and state which day you prefer, December 13 or 14th. Send those back to nancy@copicmarker.com.

And, Sharon has informed me that she is looking to hold a class in the Dallas area in Feb. 2010. Get on the copic mailing list (on the sidebar of my blog) to be notified when applications and info are released on that venue.

Here's a rundown of our current class offerings:

October

24th Coos Bay, OR taught by Marianne Full
25th Evansville, IN taught by Sally Lynn Full
28th Grand Rapids, MI taught by Marianne Open to public - almost full, closes next Wed.

November
21st Montreal, taught by Sherrie Siemens Full
22nd, Montreal, taught by Sherrie Siemens Open to Stores & Designers
22nd Columbia, SC taught by Sally Lynn Open to Stores & Designers

December
13th San Antonio, TX taught by Sally Lynn Open to Stores & Designers
14th San Antonio, TX taught by Sally Lynn Open to Stores & Designers


OK, I have a very busy weekend, but I'll try to post a tutorial. Have fun!

Thursday, October 15, 2009

Coloring a sweater

As the weather quickly grows cold and wet I figure now is a good time to cover how I color a nice fuzzy sweater. This project will really show you if the paper you like to use is too soft or not absorbent enough. Be sure to work with plenty of scratch paper under your work, as this technique will really soak through most papers.

Adding texture to a specific area
In this image I want the main body of her sweater to look like a knit, but the ribbing on the cuffs should be straight and I don't want her skirt or skin to get textured either. This is where you need to plan ahead. If you add the texture after you've colored the whole picture then you'll want to mask off any areas that you don't want to get textured.

This is a picture I drew last week and since it is going into my example book I photocopied my original onto color laser copier paper. As I mentioned earlier, paper will make a huge difference in your final results. You'll get better results if you work on Neenah Classic Crest Solar White, Copic sketchbook paper, or Copic Stamping paper. Prism Simply Smooth will work but you'll need to soak the texture more, along with Papertrey Ink, and Gina K. papers. Test a few paper types until you get the technique to work correctly.

I start by coloring her main sweater nice and evenly with a BV00. To make sure it is really smooth I started at one sleeve and colored with the side of the brush (not the tip) in circles, really soaking the paper evenly. I didn't let any area get too dry or else I would have had streaking.

Next I added my darker BV04. Usually this is too big a color jump in this family, but I couldn't find my BV02 and I know that I'm going to be adding texture anyways so I went for it.

Notice how I added my darker color in feathered strokes. In areas that I want to have a softer blend I lift up at the end of my stroke. This puts less dye on the page and makes it easier to blend back in.

Then I come back with my BV00 and color over the whole area. In this case I start coloring on the light side and push my BV00 into the darker BV04. See how the whole sweater gets darker and the areas that I feathered with the darker purple really blended in nicely. If the sweater is a little uneven or blotchy at this point it's OK, since I'm going to be adding texture anyways.

Now I'm ready to add my texture. On an older post I added texture with a wadded paper-towel soaked in Copic Colorless blender solution. In this example I don't want the wrinkly look that worked with the bushes, I want a specific sweater looking texture. What better way to get sweater texture than with a sweater? Luckily my husband had a black sweater hanging in the closet with just the right woven look I wanted. This technique won't ruin the sweater (though try at your own risk) and if any color happened to come off my paper it wouldn't show up on the black sweater anyways.

This will take practice to get it right, so don't give up if it doesn't work the first time (click on the photo to enlarge).

At this point I would suggest getting clean, absorbent scratch paper under your work. Any stray color on your scratch paper might bleed through where you don't want it.

After my base colors were dry, I carefully pinched a small area of the sweater in my fingers, about the size of a large coin, and soaked it in colorless blender solution. Not sopping wet, just a little damp. Then I dabbed it onto my sweater.

In the first try you'll see it was too wet and is kind of soft and washed looking. You might like that look, but I want a stronger knit look. This wet look is caused by one of a few things:

1. Wrong paper. softer papers, like Georgia Pacific, will not give crisp definition.
2. Base color too wet. Let the base colors dry longer before adding texture, particularly on thicker papers.
3. Too much blender soaked into your texture fabric. Let your fabric dry a bit more before you try again (I like to make a test-dab first to see how wet my fabric is)
4. Holding your texture too long in one place. Test and practice to see how long you need to hold it in place. This varies from paper type to paper type.
5. No scratch paper/ wet scratch paper. Get clean scratch paper before you try this.

To fix the first try I let my paper dry completely and I used less blender on my husband's sweater. Then I carefully dabbed it on again over the same area. Success! See how crisp the sweater texture is. Notice on her arm that the color was bleeding a bit. After I finished texturing the whole area I went back and fixed my bleeding mistakes using the colorless blender. Be sure to clean up the pendant while you are working on other mistakes. Then I colored the ribbing last, in little streaks, with the BV00 and BV04. Now it's the same color as the sweater, but without the knit look.

Here is my final artwork that I colored last week and I forgot to scan in the steps. Original artwork by Marianne Walker. Hair/notebook Y11, E31 Sweater BV00, BV04, Blender Skirt R83, R85, R89 Shoes R83, Blender Skin E000, E11, BV31 Socks BV31. Now your artwork can have a fuzzy, warm winter. Have a great day!

Monday, October 12, 2009

Prize Winner and Certification

Thank you to everyone who left comments on this weekend's giveaway! I used Random.org and was able to pick out one lucky winner for the 12 pc. set.

The winner is Wendy! Wendy wrote:

I have just begun to use copic markers, after seeing all the wonderful creations, I just had to try them out. I have never liked the way the other markers worked when I would try to color in an image, especially when it comes to coloring a face and making it look natural...that was until I bought my first copic markers. I love them and want to buy more. They are worth the price!! Thank you for a chance to win a set.

Thank you,
Wendy

Wendy, thank you for your fabulous testimonial. I too hated coloring until I discovered the fabulous Copic markers. I know you will love those.

Certification update:
The last Certifications for 2009 are all open and filling fast, if they aren't full already. If you still need an application for any session that is not full please e-mail nancy@copicmarker.com

I hope to see you at a class this Fall!

October
24th Coos Bay, OR taught by Marianne Full
25th Evansville, IN taught by Sally Lynn Full
28th Grand Rapids, MI taught by Marianne Open to public - filling FAST!

November
21st Montreal, taught by Sherrie Siemens Full
22nd, Montreal, taught by Sherrie Siemens Open to Stores & Designers
22nd Columbia, SC taught by Sally Lynn Open to Stores & Designers

December
13th San Antonio, TX taught by Sally Lynn Full
New! 14th San Antonio, TX taught by Sally Lynn Full
*note: The San Antonio class on the 13th filled so quickly that we were able to add a second session and it also filled. We will be moving to a larger venue. Keep submitting applications and we will notify everyone once we have the final class size/location determined.

Friday, October 9, 2009

Back in Town and Back to Prizes

OK, so you might have thought that I've dropped off the face of the earth, but know that I'm still here, and I am back from traveling for a while. The tutorial I was going to post this morning sadly I was having too much fun coloring and I totally forgot to stop and scan in the steps, so I have to re-do it for the weekend, but it will be worth the wait.

Meanwhile, to celebrate that I'm back in town for a bit I want to offer a prize. Please leave a comment on this post stating:

1. How do you use copics
2. Why do you like them?

or, if you don't use Copics,

1. Why do you want to try them out? What are the things that you've heard about them that makes them sound so great?

I will randomly choose a winner on Monday at Noon. One winner will receive a free Sketch Set, a value of over $70!! (Actual set may vary from photo) Please make sure you leave a valid e-mail address for me to contact you at. Contest open only to North America.

Thanks for leaving a comment, and good luck winning!

Friday, September 25, 2009

Friday Art Links & Certification

It's Friday, and although I haven't been the best about posting tutorials recently, I do have some really neat things I would like to share, along with updates on upcoming Copic Certification classes.

Friday Art Links
If you get a chance please
• For any animation student out there I just got notice of a Brazilian Student Animation festival that is currently accepting international works. You can get more information by visiting their website WWW.VOUANIMARTE.COM.BR

• Anyone who is going to be traveling through Eugene, OR in the next few months should check out the new exhibit at the University of Oregon's Art Museum.
Faster Than a Speeding Bullet: The Art of the Superhero
This opens tonight with a free preview night. There are some really neat lectures and events in conjunction with this exhibit. I will be drawing with kids and adults on Saturday Nov. 7 in the evening, so you can come and color or airbrush your own superhero art.

• October is National Breast Cancer Awareness Month, so I wanted to share a couple Breast Cancer Awareness Art links:

www.canceranswers.org/gallery/ Breast Cancer Answers Art Gallery shows a series of words related to cancer and you can view art that explores each aspect of the process.

www.breastcancerart.com a unique artist who makes body casts of women and turns it into breast cancer art

kanikacancerart.blogspot.com
This blog is devoted to artwork by Kaneka Marshall and is dedicated to her mother who lost her battle with Breast Cancer.

Please show your support in October for Breast Cancer Awareness. I'll try to share some other links and projects throughout the month.

Upcoming Events and Certification
Monday I leave for Savanna College of Art and Design to attend their annual Tools of the Trade show, October 1-3. Where else can you visit Copic in the next few months?

U of O Tools of the Trade Show Nov. 18th and 19th, Eugene, OR. I will be demoing the markers and focusing on the Art of Superheroes to go along with the U of O museum exhibit. I will also be hosting a special Copic workshop the evening of the 19th at DIVA.

Fall 2009
Certification applications for classes in the next two months are now available. If you did not get one yet you need to email Nancy.

Nancy is our fabulous new Certification Coordinator. She is an avid crafter and loves stamping and is ready to keep the Certification program running smooth for everyone. Any questions, requests, or concerns relating to certification classes can be passed directly to her nancy@copicmarker.com or you can call her toll free 866-662-6742, just ask for Nancy

October
4th Decatur, GA taught by Sally Lynn FULL
24th Coos Bay, OR taught by Marianne Opens to public next week
25th Evansville, IN taught by Sally Lynn Almost Full!! Open to Stores & Designers
28th Grand Rapids, MI taught by Marianne Open to Stores & Designers

November
21st Montreal, taught by Sherrie Siemens Open to public - filling FAST!
22nd, Montreal, taught by Sherrie Siemens Open to Stores & Designers
22nd Columbia, SC taught by Sally Lynn Open to Stores & Designers

Applications have NOT gone out for the following locations:

December
13th San Antonio, TX taught by Sally Lynn

We are currently in the planning stages for 2010, so if you have a location you would like to see a class please let us know. There will be a lot of new venues and other changes next year, so keep your eyes out for that information. If you are a store interested in hosting a special event with one of our Certification instructors while they are visiting your city please contact Nancy and she will pass your request on to them.

Friday, September 18, 2009

Scrapfest 2009

Yesterday was fabulous! We had a great certification class with almost 50 papercrafters here in Minneapolis, MN and now we're getting ready for Scrapfest at the Mall of America today.We are anticipating making over 1,000 make 'n take card projects this weekend, so if you're in the area you should stop by and say HI to the crew and earn some cool "flair".

We will be in the demo booth immediately in front of Archiver's at the mall. Some of those you might see at our table this weekend include:

Debbie Olson
Kisa Peters
Cambria Turnbow
Mary Gilbertson
Joy Kennedy

Debbie Corbari
Carol HB

And we'll be doing some workshops, crops, and all sorts of fun things this weekend.

Meanwhile, I wanted to share some great links that I think you'll enjoy, particularly those of you who do a lot of work on a light table.

This is the new Trace Pad, by Light Beam Inc. I borrowed a prototype from the office a few weeks ago and I have been in love with it ever since. It is so much easier to correct my illustrations without having to work on the computer with this fabulous light table.

What is so special about this light table? It's super thin, as in, I carried it my suitcase on the way here. It's about an inch or so thick and powered by LED technology so it's cool to the touch and uses less energy than a standard table. Best of all, it produces an even glow across the whole surface. I am absolutely in love with the
one I'm borrowing. You really should check this out if you do any kind of illustration that uses a light table.

OK, I need to go eat breakfast. See you at Scrapfest!